If you’re looking for a way to improve your music videos, promotional content, and social media posts, look no further than a reactive audio spectrum waveform.
A waveform visualizer for your music can transform an audio-only experience into an incredible visual that responds to the beat and rhythm of your track.
Creating a reactive audio spectrum waveform might sound like a complex task, but thanks to Beatwave, it’s incredibly easy. In this blog post, we’ll explore what a reactive audio spectrum waveform visualizer is and how you can create one in under 60 seconds with Beatwave.
What is a Reactive Audio Spectrum Waveform?
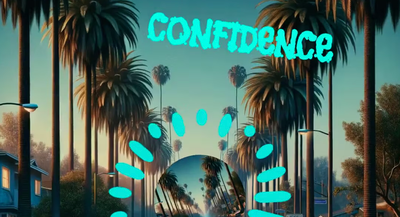
A reactive audio spectrum waveform is a visual display of an audio file’s frequency and beats, moving and changing in time with the music. A visualizer instantly grabs attention, adding an interactive dynamic to an audio track and making it more engaging for viewers.
Why Choose Beatwave?
You don’t need expensive software or video creation skills to create a reactive audio spectrum waveform. Beatwave is an online platform designed to make music visualization possible for everyone, regardless of your budget or skill level.
From novices to professionals, creating a visualizer with Beatwave can be done in under 60 seconds and in just a few clicks.
Creating a Reactive Audio Spectrum Waveform with Beatwave
Here are the straightforward steps to create a reactive audio spectrum waveform with Beatwave:
Step 1: Choose a Template
Beatwave offers a huge library of visualizer templates, perfect for every style and genre. Each visualizer template has been professionally designed to react to the beats of your music, creating an immersive visual experience.
- Visit the Beatwave platform and log in to your account. If you don’t have an account yet, signing up HERE is quick and easy.
- Browse through the visualizer templates and choose a Beatwave visualizer that you like the look of. There are TONS to choose from!
- Click on your chosen template. This is your first click.
Step 2: Upload Your Track
Now you’ve chosen your visualizer template, the next step is to upload your track to the platform. Beatwave automatically syncs your audio to the visualizer, so every beat and note is perfectly in time with the visuals.
- Navigate to the Audio section and hit ‘Replace’ on the sample track to upload your audio.
- Select your track from your device and upload it to Beatwave. This is your second click. Beatwave will process the file automatically, so all the hard work is done for you.
Step 3: Customize and Create
You’ve selected your template and uploaded your audio to the Beatwave platform; now it’s time to customize. Beatwave offers multiple customization options to ensure your visualizer is uniquely yours.
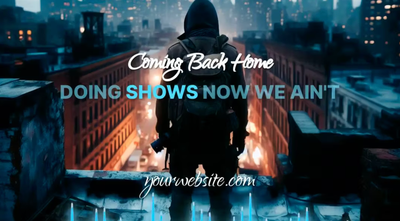
- Use the customization tools to adjust colors, the waveform style, and other visual aspects of your waveform, such as background images and videos. Experiment with different styles to see what best serves your music.
- Click on the “Export” button. This is your third click. Beatwave will render the visualizer, and your reactive audio spectrum waveform is ready to share with the world!
How to Make Your Visualizer Unique
Beatwave offers templates that you can upload your track to and export straightaway. However, making your visualizer uniquely yours is important to complement your music and brand best. Here are some ways you can customize your reactive audio spectrum waveform visualizer.
Change Orientation to Optimize for Social Platforms
You can switch the orientation of your video between portrait, square, and landscape with just one click. This will ensure your visualizer is perfectly optimized to suit the preferences of any social platform, whether it’s Instagram, YouTube, or TikTok.
Add Lyrics
Using Beatwave’s AI lyric generation feature, you can add lyrics to your visualizer with one click of a button. The platform will automatically synchronize the lyrics with your music, allowing your audience to sing along and engage with your music even further.
Upload Video Backgrounds
Add another visual layer to your waveform visualizer by uploading a video file to feature alongside it. Upload clips from a live performance, behind-the-scenes of a recording session, or your official music video to make your visualizer unique.
Why Use Reactive Audio Spectrum Waveforms?
Improve Engagement
Reactive audio spectrum waveforms instantly grab attention and will significantly boost engagement. The incredible visuals will captivate your audience and make them more likely to stay engaged throughout the entire video.
Professional Appeal
Give your music promos a professional, polished look with a visualizer. Reactive audio spectrum waveforms are particularly popular among artists, DJs, and content creators for creating consistent branding across gigs and social media platforms.
Versatility
Visualizers can be used anywhere! Share them across your social media platforms, on your website, or at your live event. Regardless of where you share your waveform visualizer, you will get attention.
Conclusion
Thanks to Beatwave, creating a reactive audio spectrum waveform has never been easier.
The Beatwave platform provides a library of professionally designed visualizer templates and a ton of customization features, making it the ideal tool for anyone looking to create visualizers quickly and effortlessly.
So, head to the Beatwave platform and create a visualizer to engage your listeners and promote your music today.